
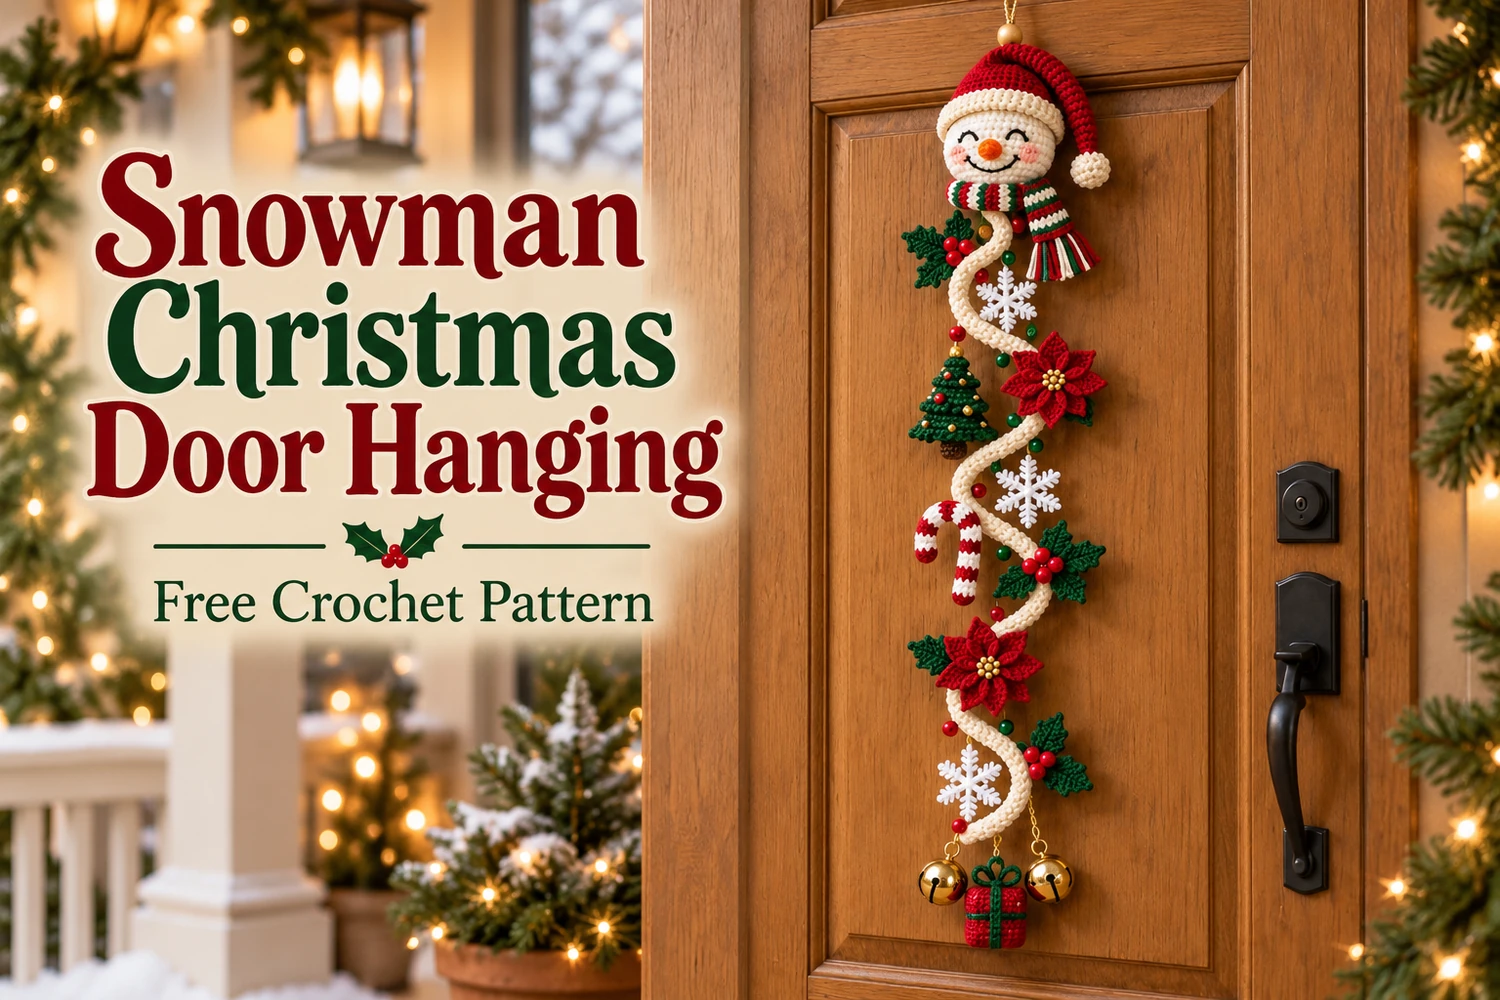
This Snowman Christmas Door Hanging Crochet Pattern combines a smiling snowman, a floppy Santa hat, and a long cream spiral decorated with holly, snowflakes, poinsettias, a tiny tree, and a candy cane. A miniature gift and two gold bells finish the bottom, following the festive arrangement in the reference.
Make the pieces separately, then sew them onto the curled strip. A concealed strong cord carries the weight from the top hanging loop to the lower decorations, helping the finished ornament keep its shape on your door.
Pattern Information
- Skill level: intermediate; several small motifs and careful assembly.
- Terminology: US crochet terms.
- Estimated length: 65–85 cm; snowman head approximately 8–10 cm wide with DK yarn. Size depends on yarn, tension, and spacing.
- Construction: stuffed head, unstuffed hat, flat curling strip, appliqués, and a reinforced hanging cord.
This is an original image-inspired adaptation. Counts have been reviewed, but the pattern has not been physically crocheted or independently tested. Use the written instructions for construction; the images illustrate the intended appearance.
Materials
- DK cotton: cream approximately 90–120 g; red 40–60 g; forest green 25–40 g; scraps of orange, brown, black, and gold.
- 2.5 mm hook for head and motifs; 3 mm hook for the cream spiral if needed for a softer curl.
- Polyester stuffing, tapestry needle, embroidery needle, scissors, pins, stitch markers.
- Strong braided hanging cord, approximately 1.5–2 m, and matching strong sewing thread.
- Two small gold craft bells, optional red and green beads, and tiny gold beads for flower centers and the tree.
- Optional wooden bead above the head. Embroidered knots can replace small beads.
This is a decorative hanging, not a toy. Keep the finished piece and its small ornaments away from young children and pets. Choose lightweight bells and decorations so they do not pull the crochet out of shape.
Responsivo Post 01 – P1
Abbreviations and Notes
- MR: magic ring; ch: chain; sl st: slip stitch.
- sc: single crochet; hdc: half double crochet; dc: double crochet; tr: treble crochet.
- inc: 2 sc in one stitch; dec: sc2tog over two stitches.
- BLO: back loop only; R: round or row, as stated.
- Picot: ch 3, sl st into the first of those three chains.
- Numbers in brackets give the finished stitch count. Turning chains and joining slip stitches do not count.
Work the head, nose, hat, berries, and gift in continuous spirals unless a join is specified. Mark the first stitch of every round. For rows, ch 1 and turn; work the first stitch into the first stitch of the previous row. For dc rows, ch 2 and turn; ch 2 does not count.
Snowman Christmas Door Hanging Crochet Pattern
1. Cream Snowman Head
Begin at the crown with cream yarn. The final closure will sit beneath the scarf.
- R1: 6 sc in MR.
- R2: inc × 6.
- R3: (sc, inc) × 6.
- R4: (2 sc, inc) × 6.
- R5: (3 sc, inc) × 6.
- R6: (4 sc, inc) × 6.
- R7: (5 sc, inc) × 6.
- R8–14: 42 sc each round.
- R15: (5 sc, dec) × 6.
- R16: (4 sc, dec) × 6.
- R17: (3 sc, dec) × 6.
- R18: (2 sc, dec) × 6.
- R19: (sc, dec) × 6.
- R20: dec × 6.
Pause after R17. Embroider the face before stuffing: two upward-curving closed eyes between R10 and R12, approximately 7 stitches apart, and a broad smile between R13 and R15. Add a few pink embroidery stitches at each cheek. Stuff firmly after R18, finish the last rounds, then gather the final six front loops closed.
Orange Carrot Nose
- R1: 4 sc in MR.
- R2: (sc, inc) × 2.
- R3: 6 sc.
Fasten off with a sewing tail. Add a tiny tuft of stuffing if needed. Sew the six-stitch opening to the center of the face between the eyes and smile; point the MR tip outward.
2. Long Floppy Santa Hat
Use red. Begin at the narrow tip. Keep this piece unstuffed so it can bend beside the head.
- R1: 6 sc in MR.
- R2–5: 6 sc each round.
- R6: (sc, inc) × 3.
- R7–10: 9 sc each round.
- R11: (2 sc, inc) × 3.
- R12–14: 12 sc each round.
- R15: (3 sc, inc) × 3.
- R16–17: 15 sc each round.
- R18: (4 sc, inc) × 3.
- R19: 18 sc.
- R20: (2 sc, inc) × 6.
- R21: 24 sc.
- R22: (3 sc, inc) × 6.
- R23: 30 sc.
- R24: (4 sc, inc) × 6.
- R25: (5 sc, inc) × 6.
- Change to cream. R26–28: 42 sc each round.
Fasten off with a long tail. Fold the cream rounds outward into a narrow brim. Test over the head crown and sew the brim in place without covering the eyes. Bend the red tip down one side and secure its curve with a few hidden stitches.
For the cream pom-pom, make 6 sc in MR; next round inc × 6 ; next round 12 sc; add a little stuffing; next round dec × 6 . Gather closed and sew to the hat tip. A yarn pom-pom of similar size is an alternative.
3. Striped Scarf
Ch 8 in cream. R1: sc in the second chain and each remaining chain. R2 onward: ch 1, turn, 7 sc. Work two rows each in cream, red, and green, repeating this six-row color sequence until the scarf measures approximately 28–32 cm. Finish after a complete two-row stripe, weave in all ends, and add short matching fringe to both ends. Wrap beneath the face and tack the overlap to the head. Do not use the scarf as the structural suspension point.
Responsivo Post 02 – P2
4. Long Cream Curling Spiral
The spiral is a narrow ruffled strip, not a stuffed tube. Its extra stitches make it curl naturally. Make a small swatch first: ch 22, then work the following two rows over its 20 foundation positions to check the curl with your yarn.
- Full strip: ch 122.
- R1: starting in the third chain from the hook, work 3 dc into each of the remaining 120 chains.
- R2: ch 1, turn, work 1 sc into each dc.
Fasten off and weave in ends. Coil the strip into a corkscrew with the foundation-chain edge on the inside. Do not flatten it by heavy blocking. Gently stretch or relax the coil to the desired hanging length. If your yarn produces a loose wave, wind it around a cylinder while shaping it dry; do not add wire. Lengthen or shorten by changing the foundation chain: every working foundation chain receives three dc, so a chain of N + 2 produces 3N dc and the same number of sc.
5. Holly Clusters — Make Three
Leaf — Make Nine
With green, ch 8. Work along one side: from second ch, sl st, sc, hdc, dc, hdc, sc, then (sl st, ch 2, sl st) into the final chain for the tip. Work back along the unused loops on the opposite side: sc, hdc, dc, hdc, sc, sl st. Join at the base and leave a sewing tail. The two sides mirror each other; the ch-2 tip does not count as a body stitch.
Red Berries — Make Nine
R1: 6 sc in MR. R2: 6 sc. Add a tiny tuft of stuffing. R3: dec × 3 . Close with the yarn tail. Sew three leaves in a fan and three berries over their joined bases for each cluster. Keep the tails for attaching each cluster to the cream strip.
6. Six-Arm Snowflakes — Make Three
Use white or cream with a firm tension. Ch 4 and sl st into the first chain to form a ring. For each of six arms, work: ch 7; sl st in the second chain from the hook and in the next chain; ch 3, sl st into the first of these three chains for a side picot; sl st into the next chain of the main arm; make another ch-3 picot; sl st into each of the three remaining main-arm chains; sl st into the center ring. Repeat the whole arm sequence six times. Fasten off. Each arm has six return slip stitches and two side picots. Pin flat and lightly damp-block before sewing. Stiffen separately with a textile stiffener only if desired, following its label.
