
7. Curly Tail
With pale pink, ch 14. Starting in the second chain from the hook, work 2 sc into every chain. Fasten off with a long sewing tail. The increases make the strip curl. Wind it gently into a loose corkscrew and sew its base behind the upper-right edge of the body. Leave the curled end free.
If the tail feels too long for your yarn, use ch 11 and work the same two-sc repeat into its ten working chains for 20 sc. Do not sew the whole tail flat; only its base needs to be anchored.
8. Join the Head to the Body
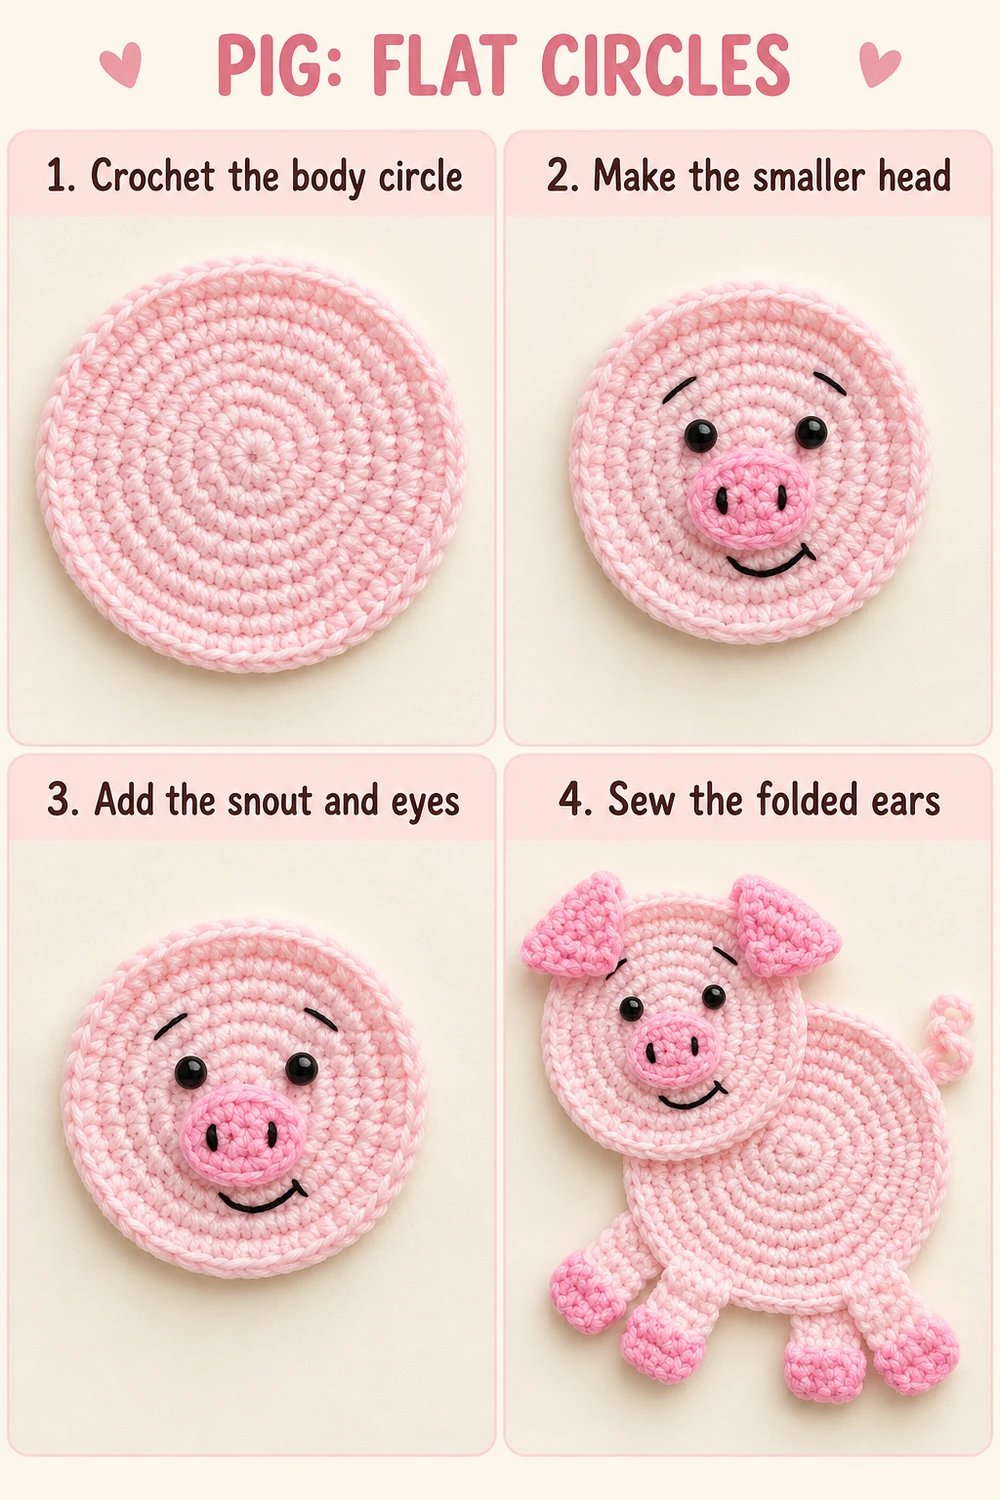
Lay the body right side up. Place the head over its upper-left quarter, with the head center slightly above and left of the body center. Aim for an overlap of approximately 2–3 cm, adjusting to match the two-circle silhouette of the reference. The face stays upright, the body extends toward the right, and the legs remain below.
Pin the overlapping section. With pale pink, sew along the part of the head edge that lies on top of the body, catching the back loops of the head edge and small stitches in the body below. Add a few hidden securing stitches inside the overlap if necessary. Leave the upper and left outer head edge free. Avoid sewing a tight line that bends either circle.
Check the pig from the front before weaving in the long tails. The ears should frame the face, the snout should remain centered, and the tail should project beyond the body at the right. Make any spacing adjustments before securing the final yarn ends.
Photo and Full Crochet Symbol Chart
The third instructional image at the end places a finished pig photo above a complete connected chart of the body circle, R1–10, with an English stitch-symbol legend alongside. Every single crochet and every increase is shown. The head follows the same chart through R8 and stops there. Work the separate snout, ears, legs, and tail from their written instructions above.
Start at the MR in the center and follow each numbered round outward. Each increase branches into two stitches from one stitch of the previous round. The chart is laid out as concentric rings for readability; the actual circles are worked continuously, without a slip-stitch join between rounds.
Blocking and Finishing
Dampen the flat pieces lightly with cool water, smooth them to shape, and pin only as needed. Let them dry completely before judging their shape. Keep the folded ears and curled tail free rather than stretching them flat. Check your yarn label before using heat or steam.
Weave in each yarn tail through several stitches on the back, change direction once, and trim close to the fabric. If using the pig as an appliqué, sew it to the chosen fabric around the stable body and head edges, leaving decorative folds free. For a small decorative mat, leave the back tidy and keep it on a flat surface.
Troubleshooting
- The circle cups: check that all six increases were worked and relax a tight tension.
- The edge waves: recount for accidental extra increases and avoid stretching while blocking.
- The face puckers: loosen the embroidery and secure it again with smaller stitches.
- The ears stand stiffly upright: fold the tips forward and tack them lightly near the base.
- The head shifts: add a few hidden stitches across the overlap without pulling the circles together.
- A hoof twists: resew the leg across its full width instead of attaching it at one corner.
Frequently Asked Questions
Is this a stuffed amigurumi pig?
No. It is a flat appliqué made from two separate circles with small unstuffed details. Keeping it flat preserves the look of the reference.
Can I use it as a coaster?
The clear body area can hold a suitably sized cup if it sits level. Use cotton and embroidered details, and check stability before placing a drink on it. The overlapping head and ears are decorative raised areas, so keep the cup away from them.
Can I change the size?
Yes. A different yarn weight and matching hook will change the size of all pieces together. For a smaller circle set, stop the body at R8 and head at R6, then shorten the legs and tail to suit. The complete version above uses ten body rounds and eight head rounds.
Can I use black beads for the eyes?
Embroidery is the default here because it stays softer and avoids loose hard parts. If the pig is purely decorative and you choose beads, sew them securely and keep the finished item out of reach of young children.
More Free Crochet Patterns
- Crochet Pig Coaster Pattern
- Heart Coaster Crochet Pattern
- Mini Penguin Amigurumi Keychain
Save This Pattern
Save this Little Pig Appliqué Crochet Pattern for your next cheerful pink project. Happy crocheting from Lovely Amigurumi!
Photo Tutorials, Full Body Chart, and Pinterest Gallery
The two step-by-step photo tutorials and finished-pig photo with its complete body chart are followed by three Pinterest images. All six images are grouped here at the end.
More Free Crochet Patterns
Find your next handmade project with these lovely patterns.
Christmas Penguin Keychain Crochet Pattern – Free Step-by-Step Guide
View Pattern →
Black Dragon Amigurumi Crochet Pattern – Free Fantasy Dragon
View Pattern →
Crochet Pig Coaster Pattern – Free Pink Pig Mug Rug
View Pattern →
CONTENT END 1
