
Rnd 1: 3 sc in 2nd ch from hook (top cap), sc in next 61 ch, 3 sc in last ch (bottom cap). Turn the work and sc in the free loops of the next 61 ch. Join. (128: 3 + 3 in the caps, 61 + 61 on the sides)
Put a marker in the top cap. Start each round with ch 1 at the first top-cap st, and join with a sl st.
Rnd 2:3 times, sc in next 61, 3 times, sc in next 61.(134)
Rnd 3:3 times, sc in next 61, 3 times, sc in next 61.(140)
Rnds 4–12:In each cap, work 3 times. Sc in the 61 sts along each side. Each round has 6 more sts than the one before. Totals:
– Rnd 4: 146
– Rnd 5: 152
– Rnd 6: 158
– Rnd 7: 164
– Rnd 8: 170
– Rnd 9: 176
– Rnd 10: 182
– Rnd 11: 188
– Rnd 12: 194 (36 + 36 in the caps, 61 + 61 on the sides)
Fasten off. The pockets are easier to sew on before the border goes on.
Check that the panel measures 6 1/4 in (15.9 cm) × 24 in (61.0 cm).
Make All Pieces
- Colors A and B: 3 pockets (rust body, peach rim)
- Color A: 1 back panel (the peach border is added later)
Layout, top to bottom:
Joining
Placement: Lay the panel flat, right side up. Measuring up the center line from the bottom tip, pin a horizontal line at each of these heights:
– Pocket 1: 2 1/2 in (6.4 cm)
– Pocket 2: 9 in (22.9 cm)
– Pocket 3: 15 1/2 in (39.4 cm)
The lines are 6 1/2 in (16.5 cm) apart. The rim of Pocket 3 ends 18 3/4 in (47.6 cm) above the bottom tip, which leaves an empty arch of 5 1/4 in (13.3 cm) at the top.
Method: Whipstitch with Color A and a tapestry needle.
Stitch-to-stitch logic:
1. Base edge: Center the 20 back sts on the pin line and whipstitch through each front loop on the Rnd 11 ridge. The pin line crosses about 23 panel rounds (5 3/4 in at 4 rounds per inch). Catch one panel round per stitch, except on every 6th stitch, where you catch 2. That puts 20 stitches across 23 rounds.
2. Side edges: Sew up along each guide strand. The 13 wall rounds lie along about 11 straight-side panel sts (3 1/4 in at 3.5 sts per inch). Move one panel st per pocket round, but stay in the same panel st twice along the way.
3. Rim: With Color B, tack the 20 back sts of Rnd 23 to the panel, spacing them the same way as the base (20 over 23).
Tension: Pull each stitch snug but not tight. If the panel puckers, you’re pulling too hard. If you can see light between the pieces, the stitches are too loose.
Checkpoint: Each pocket front should stand out about 4 1/2 in (11.4 cm) from the panel, and a roll should drop in easily. The panel should still lie flat at 6 1/4 in (15.9 cm) wide.
Border
Border gauge: Same as the body, 14 sc = 4 in (10.2 cm). Each round adds 1/4 in (0.6 cm) to every edge.
Join Color B in the first top-cap st.
Rnd 13:In the top cap, 3 times(39). Sc in next 61 (side). In the bottom cap, 3 times(39). Sc in next 61 (side). Join. (200)
Rnd 14:In the top cap, 3 times(42). Sc in next 61. In the bottom cap, 3 times(42). Sc in next 61. Join. (206: 42 + 61 + 42 + 61)
Hanging loop: Don’t fasten off. Sl st along to st 20 of the top cap. Ch 14, skip sts 21–22, and sl st in st 23. Turn, work 20 sc into the ch-14 loop, and sl st in st 20. Fasten off and weave in the ends.
Why the math works: The straight sides stay at 61 sts because a straight edge doesn’t need more length. Each cap is half of a flat circle. A flat sc circle gains 6 sts per round, so each half gains 3. Together the two caps add 6 sts per round, which keeps the border flat with no ruffling or cupping.
Final Blocking
- Put a roll in each pocket so the pockets keep their shape.
- Mist the whole piece lightly until it’s evenly damp.
- Lay it flat and pat the panel out to 7 1/4 in (18.4 cm) × 25 in (63.5 cm).
- Smooth the peach border so the caps make even curves.
- Pin the loop straight up from the center of the top cap.
- Let it dry completely, at least 24 hours, before you hang it.
Final Quality-Control Checklist
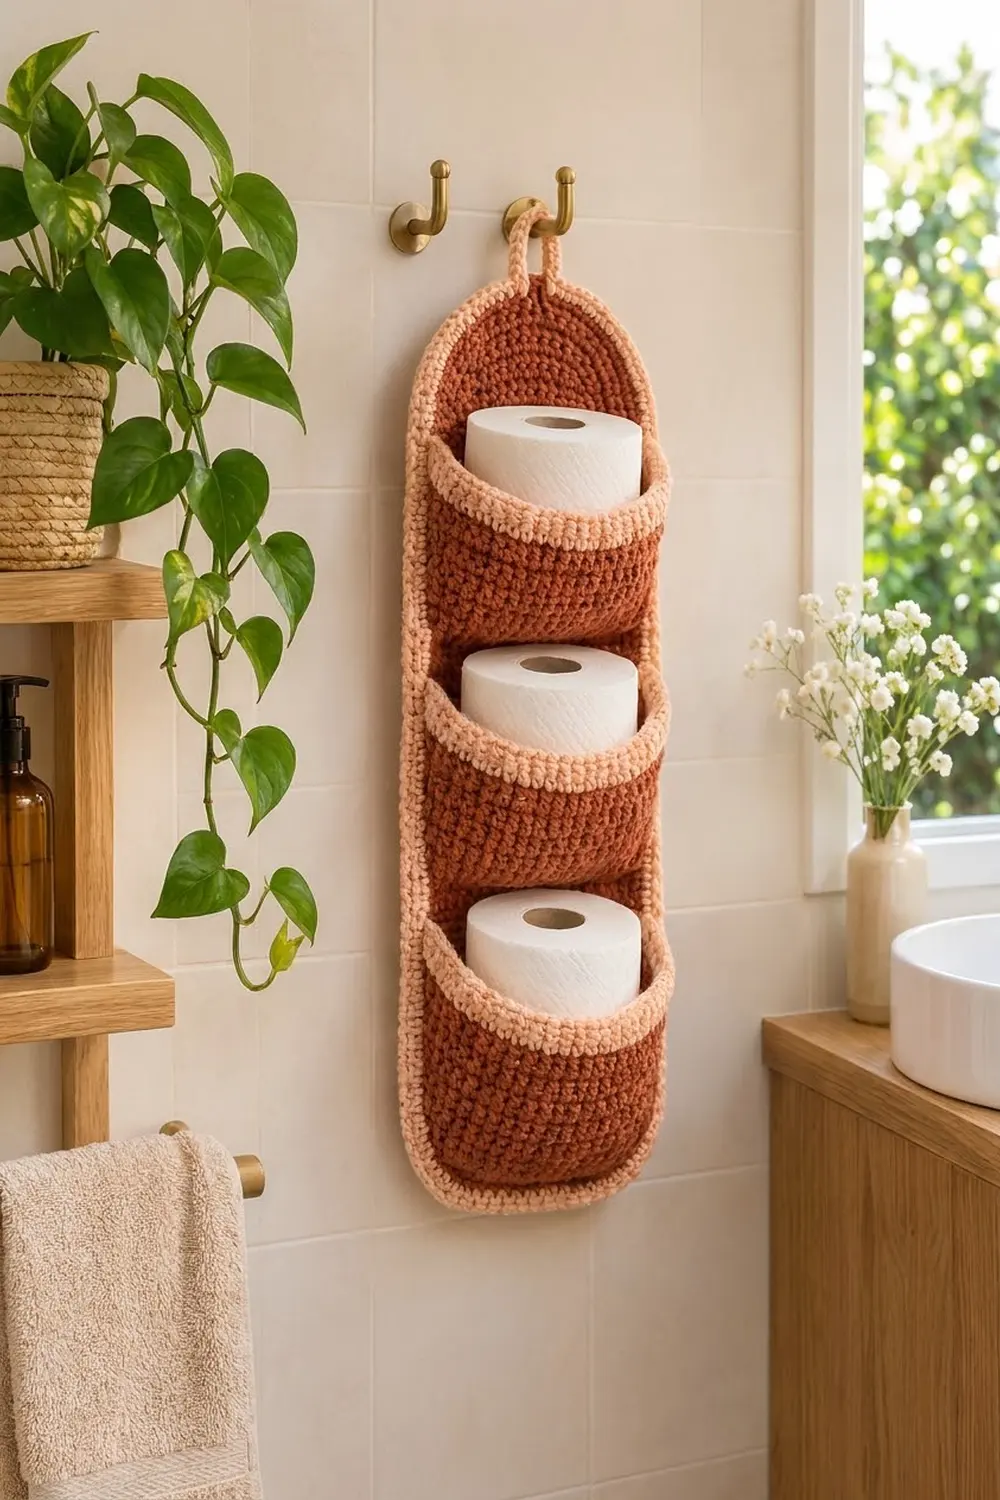
- The panel measures 7 1/4 in (18.4 cm) × 25 in (63.5 cm) and lies flat
- The border has 206 sts and smooth, even caps
- Each of the three pockets has 64 sts and a 3-round peach rim
- The pockets are level, centered, and 6 1/2 in (16.5 cm) apart
- Each pocket holds a roll upright
- The loop is secure and centered at the top
- No ends show on the front
Troubleshooting
- The caps ruffle: There are extra increases. Count the cap sts against the totals listed.
- The caps cup: Increases were missed or your tension got tighter. Recount, or work the caps with a hook one size larger.
- The caps come out pointed: The increases are stacking on top of each other. Shift the start of each repeat over by one st.
- A roll won’t fit: Your gauge is too tight. Remake the pocket with a larger hook, or add a base round (70 sts) and keep the back at 20 sts.
- A pocket sags forward: Tack the rim more firmly, especially at both back corners.
- The panel stretches longer: Use a firmer cotton or a smaller hook.
Care
Hand wash in cool water, reshape, and dry flat. Don’t use a dryer, which can shrink cotton unevenly and distort the pockets.
Final Notes
Every measurement depends on the one before it:
– Gauge: 14 sc = 4 in (10.2 cm)
– Each pocket: 64 sts around and 3 1/4 in (8.3 cm) tall
– Panel: 194 sts, measuring 6 1/4 in (15.9 cm) × 24 in (61.0 cm)
– Two border rounds bring it to 206 sts and 7 1/4 in (18.4 cm) × 25 in (63.5 cm)
If your piece matches each checkpoint, the pockets will hold standard rolls and the panel will hang flat and straight.
Happy crocheting!
