
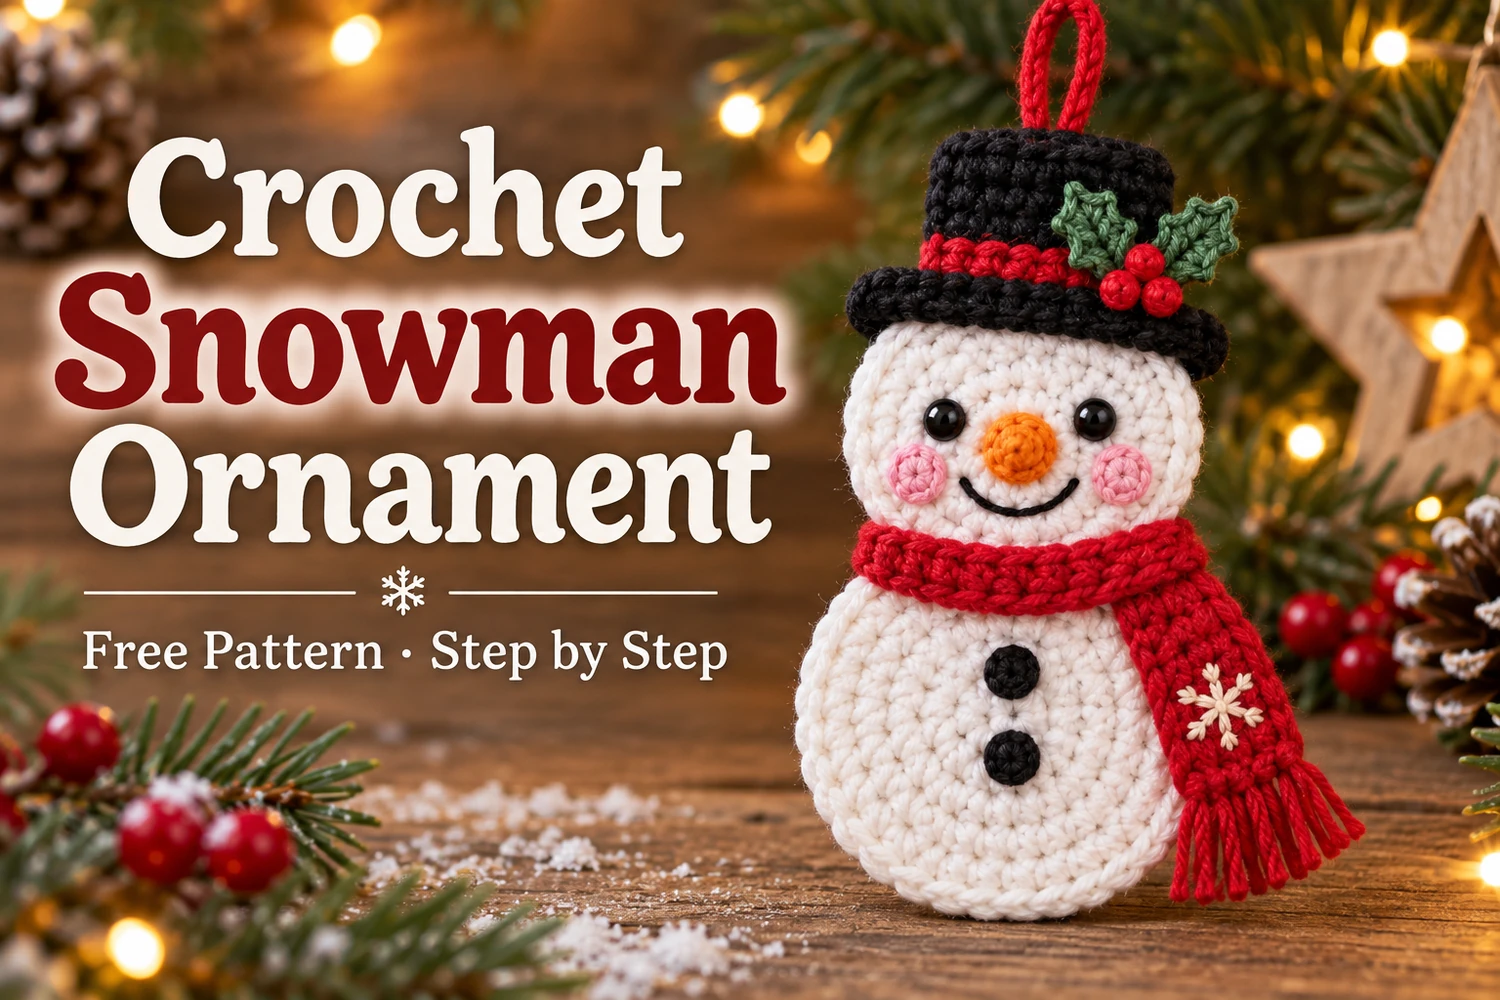
This Holly Hat Snowman Ornament Crochet Pattern makes a cheerful flat snowman with a black top hat, bright red scarf, holly decoration, and a red hanging loop. Round pink cheeks, an orange nose, and two black buttons follow the details of the reference.
The head and body are separate white crochet circles joined at the neck. Add a flat hat and scarf, then finish with the small sewn decorations. The ornament stays unstuffed, making it suitable for a Christmas tree, gift tag, or seasonal wall display.
Pattern Information
- Skill level: confident beginner to intermediate; flat circles, simple rows, embroidery, and assembly.
- Estimated height: 18–22 cm excluding the loop with DK cotton and a 2.5–3 mm hook. Tension affects size.
- Construction: separate flat components sewn into one snowman silhouette. No stuffing is needed.
- Terms: US crochet terminology.
This is an image-inspired adaptation. Stitch counts have been reviewed, but the design has not been physically crocheted or independently tested. The photographs show the intended appearance; follow the written pattern for the construction.
Materials
- DK cotton: approximately 25–35 g white, 10–15 g black, 10–15 g red, and small amounts of green, orange, and pink.
- 2.5–3 mm hook, tapestry needle, scissors, markers, pins, and a blocking mat.
- Two black sew-on eyes or embroidery yarn; two black buttons for the body.
- Fine black thread for the smile and ivory thread for the scarf snowflake.
- Optional: embroidered eyes and buttons instead of attached notions.
Abbreviations
- MR: magic ring; ch: chain; sl st: slip stitch.
- sc: single crochet; hdc: half double crochet; dc: double crochet.
- inc: 2 sc in the same stitch; dec: sc2tog.
- Picot: ch 3, sl st into the first of those chains.
- Numbers in brackets give stitch counts. Turning chains and joining slip stitches do not count.
Work the circles in continuous rounds and move the marker at the beginning of each round. Work the hat, band, and scarf in turned rows. A starting ch 1 or ch 2 does not count as a stitch.
Responsivo Post 01 – P1
Holly Hat Snowman Ornament Crochet Pattern
1. White Body Circle
- R1: 6 sc in MR .
- R2: inc × 6 .
- R3: (sc, inc) × 6 .
- R4: (2 sc, inc) × 6 .
- R5: (3 sc, inc) × 6 .
- R6: (4 sc, inc) × 6 .
- R7: (5 sc, inc) × 6 .
- R8: (6 sc, inc) × 6 .
Sl st into the next stitch and fasten off with a long sewing tail. Keep the disc flat. Do not add straight rounds around its edge, as that would make a cup instead of a flat ornament.
2. White Head Circle
Repeat body R1–7, stopping at 42 sc. Sl st into the next stitch and fasten off with a long tail. This makes the head slightly smaller than the body. Weave in the MR tails on the back, leaving the assembly tails free.
Lay the body upright and overlap the lower edge of the head over the upper edge of the body by approximately 1–1.5 cm. Pin the two circles on one vertical center line. Sew across the overlapping section through dense stitches, taking several passes. The scarf will cover this join.
3. Black Top Hat
Crown:ch 23 with black. Row 1: hdc in the third chain from the hook and in each remaining chain . Rows 2–7: ch 2, turn, 21 hdc . Fasten off with a sewing tail. The crown is a flat rectangle, not a cylinder.
Brim:ch 30 with black. Row 1: sc in the second chain from the hook and each remaining chain . Row 2: ch 1, turn, 29 sc. Fasten off with a long tail. Center the brim along the lower edge of the crown, leaving four brim stitches extending beyond each side, and sew the edges together.
Red band:ch 22 with red. Row 1: sc in the second chain and each remaining chain . Row 2: ch 1, turn, 21 sc. Fasten off. Sew this band across the lower two rows of the crown, just above the black brim.
Place the hat over the upper edge of the head. Sew its lower crown and brim to the head through several dense stitches. Keep the brim corners free enough to form a gentle curve. The hat should remain centered and flat.
4. Red Scarf
Neck strip:ch 32 with red. Row 1: hdc in the third chain and each remaining chain . Row 2: ch 2, turn, 30 hdc. Fasten off. Center the strip across the neck join, take the two ends around to the back, and sew them together without squeezing the white circles.
Responsivo Post 02 – P2
Hanging scarf end:ch 8. Row 1: sc in the second chain and each remaining chain . Rows 2–12: ch 1, turn, 7 sc. Fasten off with a long tail. Sew its upper edge to the front-right portion of the neck strip, letting it hang down over the right side of the body.
Loop fringe: join red to a lower corner of the scarf end. In each of its seven bottom-edge stitches work (sl st, ch 8, sl st in the same stitch). This makes seven closed chain loops. Fasten off and weave in the ends. Embroider a small ivory snowflake on the lower half of the scarf using three crossing straight lines and short angled branches.
5. Face and Body Details
Cheeks:with pink, make 6 sc in MR, then inc × 6 . Sl st and fasten off. Make two. Sew them near the lower sides of the head.
Nose:with orange, make 4 sc in MR. R2: (inc, sc) × 2 . R3: dec × 3 . Fasten off and gather the remaining opening. No stuffing is necessary. Sew the small rounded nose to the face center with its closed end facing forward.
