
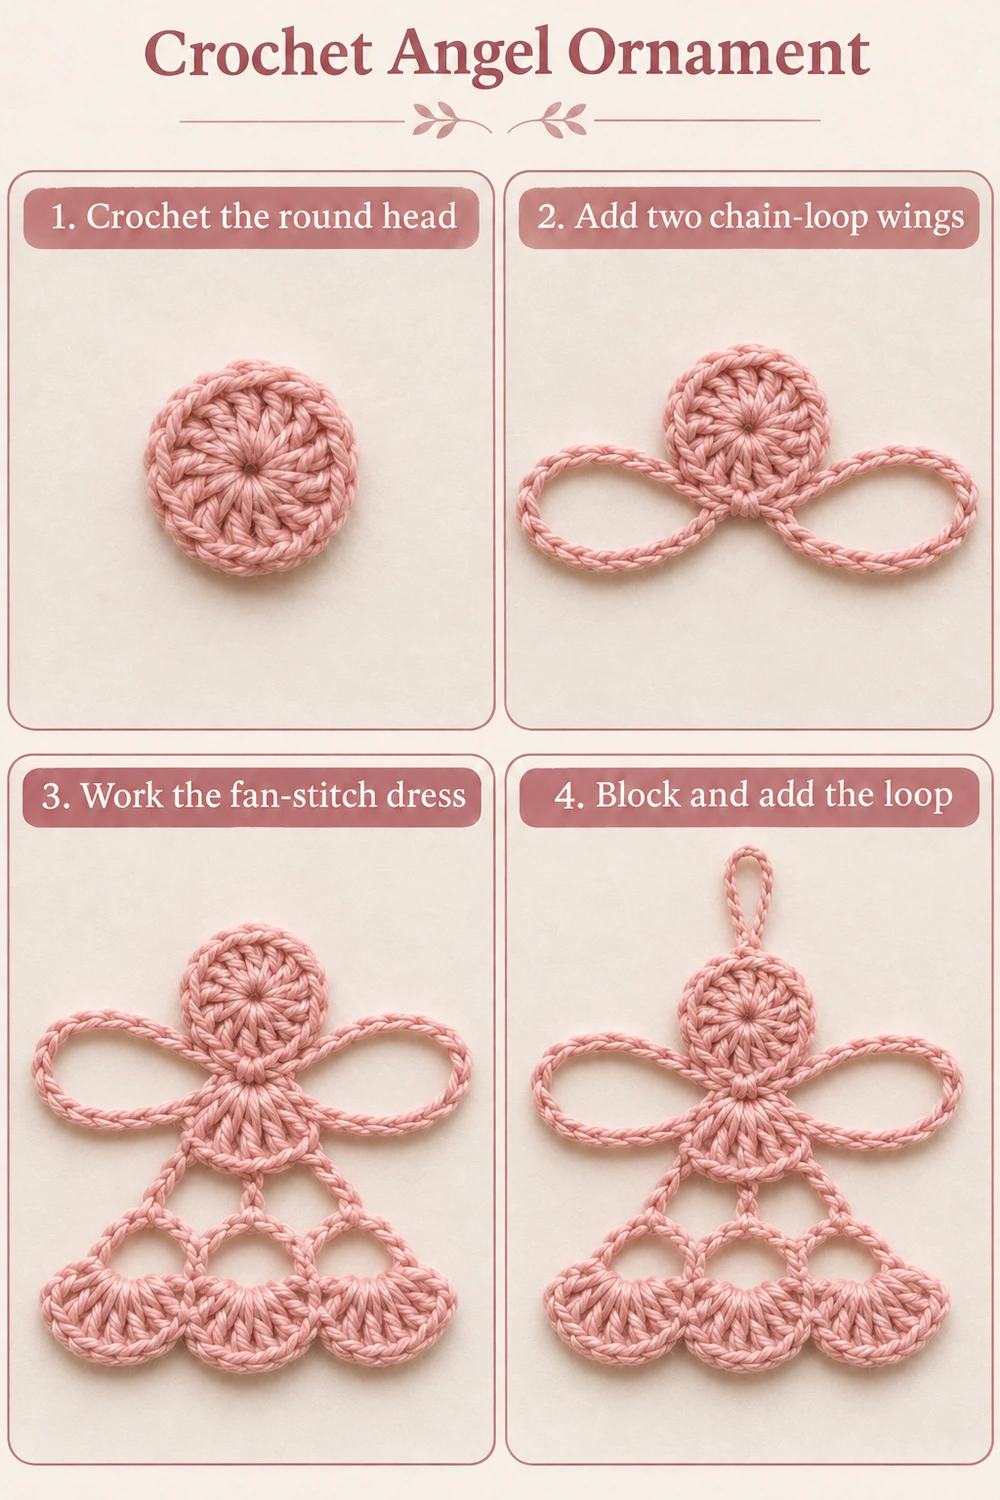
Join yarn with a sl st at the left side of the neck seam. Ch 18 and sl st back into the same neck point to form the left wing. Fasten off. Repeat at the right side of the neck seam to make the second wing.
Keep the two chain loops equal in length and tension. Shape each loop into a long oval that spreads outward beside the head and upper dress. The wings are open chains, with no filling stitches inside. Use the tails to reinforce the neck join, then weave them through several stitches on the back.
If the wings twist, let the work relax before blocking and untwist each chain before pinning. Avoid pulling one side longer to compensate for uneven chains; remake the uneven loop so both wings have the same number of chains.
5. Block and Shape the Angel
Lightly dampen the angel and place it face up on a blocking mat. Pin the head into a round shape, set the hanging loop upright, and spread the wings evenly to the sides. Open the dress spaces and arrange the three shells into a balanced scalloped hem.
Allow the cotton to dry completely before removing the pins. For a firmer finish, use a suitable fabric stiffener according to the manufacturer’s directions, testing it on a scrap of the same yarn first. Preserve the open spaces rather than saturating them with excess product.
How to Read the Two Tabletop Charts
Two of the three instructional images show a complete stitch-symbol chart on a paper sheet above the finished angel lying on a table. Both charts describe the same pattern in different tabletop settings.
The head is a separate round of 12 dc, including the beginning ch 3. Its ch-10 hanger sits above it. Each long oval wing contains 18 chain symbols. The dress starts at its own ch-4 ring, opens through Rows 1 and 2, and ends in three 7-dc shells. Dashed marks at the neck indicate sewing, not crochet stitches. Follow the small row numbers and the English symbol key, and check the written instructions when changing direction.
Helpful Finishing Tips
- Head curls: check that there are 12 dc in the MR and that the stitches have not been pulled too tight.
- Wrong shell count: revisit Row 3. Work one shell into each of the three ch-3 spaces, leaving three shells.
- Wings droop: block them as long ovals and let them dry fully before hanging.
- Dress tilts: center the foundation ring under the head before sewing and pin both sides of the neck join.
- Loops snag: store the ornament flat in tissue paper with its wings arranged beside the dress.
To make a garland, crochet several angels in the same yarn and attach their top loops to a separate cord. Keep the cord’s weight off the wing loops so the shapes stay even. For a gift topper, tie a separate ribbon through the top hanging loop.
More Free Christmas Crochet Patterns
- Blue Scarf Snowman Wall Hanging
- Six-Point Star Ornament
- Christmas Bell Ornament
Save Your Lace Angel Ornament Crochet Pattern
Save this little pink angel for your handmade Christmas decorations. Happy crocheting from Lovely Amigurumi!
Photo Tutorial, Two Tabletop Charts, and Pinterest Images
Find all six 1000 × 1500 images below: one photo tutorial, two matching chart-and-piece tabletop views, and three Pinterest images.
More Free Crochet Patterns
Find your next handmade project with these lovely patterns.
Christmas Lace Star Crochet Pattern – Free Five-Point Ornament Guide
View Pattern →
Granny Stitch Gingerbread Crochet Pattern – Free Ornament Guide
View Pattern →
Blue Lace Snowflake Crochet Pattern – Free Ornament Guide
View Pattern →
CONTENT END 1
