
Work these rows back and forth over the back loops only. Each row has one fewer ch-5 sp than the row before, which narrows the back into the teardrop point.
Row 1: Join cream with sl st in the center ch of loop 1. Ch 1, LK in loop 1. *Ch 5, LK in next ch-5 sp; rep from * 6 more times, ending in loop 8. Turn. (8 LK, 7 ch-5 sps)
Row 2: Ch 1, sk the first LK, sl st in each of the first 3 ch of the next ch-5 sp, ch 1, LK in same sp. *Ch 5, LK in next ch-5 sp; rep from * 5 more times. Turn. (7 LK, 6 ch-5 sps)
Row 3: Work as Row 2, repeating from * 4 more times. Turn. (6 LK, 5 ch-5 sps)
Row 4: Work as Row 2, repeating from * 3 more times. Turn. (5 LK, 4 ch-5 sps)
Row 5: Work as Row 2, repeating from * 2 more times. Turn. (4 LK, 3 ch-5 sps)
Row 6: Work as Row 2, repeating from * 1 more time. Turn. (3 LK, 2 ch-5 sps)
Row 7: Ch 1, sk the first LK, sl st in the first 3 ch of the next ch-5 sp, ch 1, LK in same sp, ch 5, LK in next ch-5 sp. Turn. (2 LK, 1 ch-5 sp)
Row 8: Ch 1, sk the first LK, sl st in the first 3 ch of the last ch-5 sp, ch 1, 3 sc in same sp. (3 sc) Fasten off.
Loops 9–12 at the front stay open. They form the low front lip that holds the roll in place. Check: the apex sits 9 in (22.9 cm) above the base. Weave in the cream ends.
Make All Pieces
Work the Base, Sides, Lattice Rounds, Back Panel Rows, Edging, and Strap until you have 3 identical pockets.
- Per pocket: about 80 g (123 m) lavender and 23 g (35 m) cream
- Total: 3 pockets
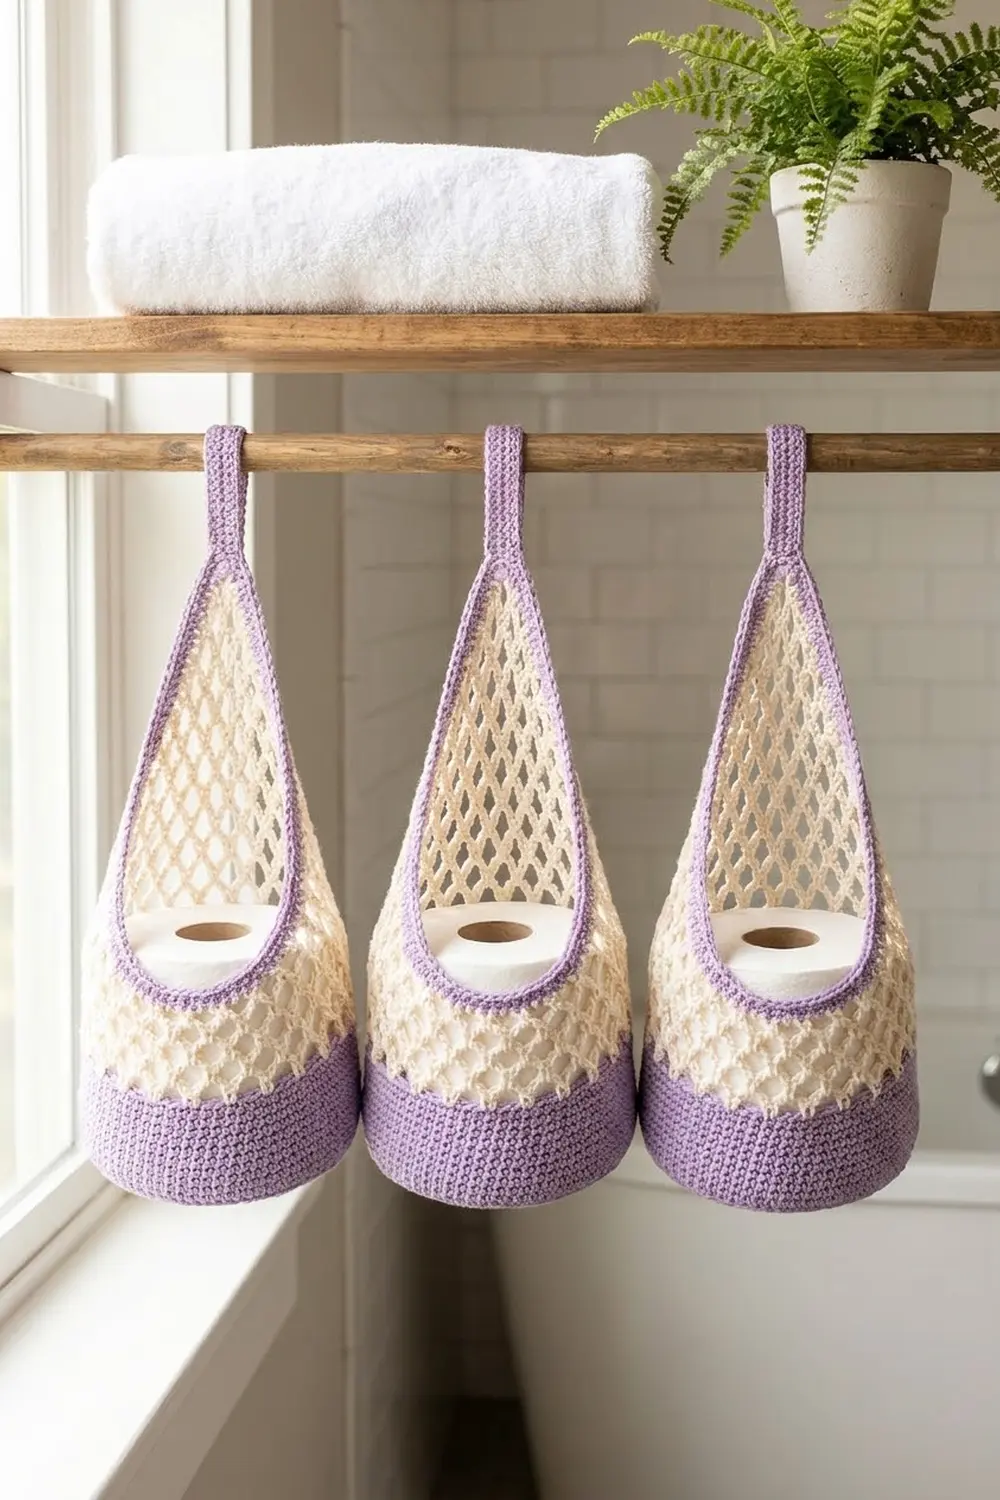
Layout on the rod, viewed from the front:
Space the straps about 6.5 in (16.5 cm) apart, center to center. A rod at least 20 in (50.8 cm) long holds all three comfortably.
Assembly and Hanging
The pockets are not joined to each other. Each one hangs from its own strap, so it is easy to remove and wash.
The only seam is the strap loop, which you sew after the edging, strap, and blocking are done. Fold the strap toward the WS and whipstitch its last row to Strap Row 1, matching all 5 sts one to one. Keep the stitches snug but not tight so the apex does not pucker.
If your rod has fixed end brackets, slide the pockets on before you mount it. The loop also fits over a wall hook up to 1.25 in (3.2 cm) deep.
Check: each loop measures about 2.25 in (5.7 cm) from fold to seam, and all three pockets hang at the same height.
Edging and Strap (Lavender)
Edging gauge: same as the base, 15 sc = 4 in (10.2 cm).
Edging Rnd 1: With RS facing, join lavender in the first sc of Row 8.
- Apex: sc in first sc, 3 sc in center sc, sc in last sc. (5 sts)
- First side: 3 sc in each row-end of Rows 7 down to 1. (21 sts)
- Front lip: 2 sc in the free half of loop 8, 5 sc in each of loops 9–12, 2 sc in the free half of loop 1. (24 sts)
- Second side: 3 sc in each row-end of Rows 1 up to 7. (21 sts)
Sl st to first sc. Total: 5 + 21 + 24 + 21 = 71 sts.
Edging Rnd 2: Ch 1, sc in each st around, working 3 sc in the center apex st, join. Total: 71 sts worked 1 per stitch + 2 extra at the apex = 73 sts (apex 7, sides 21 each, lip 24). Fasten off.
Why the math works: The front lip covers 4 full loops plus 2 half-loops. That equals 25 base sts, or about 6.7 in (17.0 cm) of relaxed net. The 24-sc edge measures about 6.4 in (16.3 cm), so the lip pulls in slightly and hugs the roll. On each side, 3 sc per 0.75 in (1.9 cm) row gives 21 sc, about 5.6 in (14.2 cm). That is slightly shorter than the relaxed diagonal mesh, so it draws the sides in and makes the curved teardrop shape. The 3-sc apex increase in both rounds keeps the point sharp.
Strap Row 1: With RS facing, join lavender in the 2nd st before the center apex st of Edging Rnd 2. Sc in the same st and the next 4 sts. (5 sts) The center apex st is the middle of these 5.
Strap Rows 2–20: Ch 1, turn, sc in each st across. (5 sts)
The strap measures about 1.3 in (3.3 cm) wide and 5 in (12.7 cm) long. Fasten off and leave a 12 in (30.5 cm) tail for sewing.
Final Blocking
- Weave in all remaining ends on the WS, hiding them along the lavender edging.
- Soak the pocket in cool water for 10 minutes. Press out the water in a towel without wringing.
- Put a toilet paper roll in a plastic bag and slide it into the bowl to set the base and wall.
- Lay the pocket back-down on a blocking mat. Ease the apex upward until it sits 9.5 in (24.1 cm) above the base.
- Pin the side edges into a smooth curve and open each lattice ring so the knots sit evenly.
- Level the front lip at about 4 in (10.2 cm) above the base, including the edging.
- Pin the strap flat and straight.
- Let it dry completely, then sew the strap loop.
Final Quality-Control Checklist
- Base is flat and about 5 in (12.7 cm) across.
- Wall is 2 in (5.1 cm) tall with a crisp BLO fold.
- Both lattice rounds have 12 loops.
- Back rows step down 7, 6, 5, 4, 3, 2, 1 ch-5 sps.
- Edging Rnd 1 has 71 sts and Edging Rnd 2 has 73 sts.
- The strap is 5 sts wide and centered on the apex.
- All three pockets are within 0.25 in (0.6 cm) of 9.5 in (24.1 cm) tall.
- A roll slides in easily, and its top shows above the lip.
Troubleshooting
Base ruffles or cups too early: Your increases are tight. Use a larger hook for Rnds 1–10 only.
Roll does not fit: The base measures less than 16 in (40.6 cm) around. Remake it with a 5.5 mm hook.
Lattice looks crooked: Work every LK into the center ch of its ch-5 sp, not near one end.
Front lip flares: On Edging Rnd 1, work 4 sc in each full lip loop instead of 5.
Apex is lopsided: Make sure each back row starts in the first ch-5 sp. Missing one shifts the point to the side.
Strap stretches: Make the strap with a smaller hook, or sl st along both long edges.
Care
Machine wash cool on a gentle cycle in a mesh bag, then reshape and dry flat. Avoid hot dryers, which can shrink the cotton and distort the teardrop shape.
Final Notes
Each pocket depends on one chain of measurements. A 5 in (12.7 cm) base gives a 16 in (40.6 cm) circumference. A 2 in (5.1 cm) wall plus two lattice rounds puts the lip at 3.5 in (8.9 cm). Eight back rows raise the apex to 9 in (22.9 cm), and the edging adds 0.5 in (1.3 cm) for a total of 9.5 in (24.1 cm). Finally, a 5 in (12.7 cm) strap folds into a 2.25 in (5.7 cm) loop. Check each step on your first pocket and the other two will match it.
Happy crocheting!
